

Key Takeaways
- Wood look porcelain is not the same as regular tile. Larger format planks are significantly harder to install than standard 12×12 tile. The final outcome depends heavily on the installer’s skill and the materials they use, not just the product you pick in the showroom.
- Manufacturing imperfections are real and unavoidable. Every tile comes out of a kiln with some degree of variation. Knowing what to look for before you buy protects you from expensive surprises after installation starts.
- The 50/50 offset pattern is a mistake. Most manufacturers prohibit it for technical reasons, and ignoring that guidance voids your warranty. There are better options that look just as good.
- Your installer matters more than your tile. A skilled installer working with mid-range porcelain will outperform an inexperienced one using premium material every single time.
- Wood look porcelain beats luxury vinyl plank for the long haul. The upfront cost is higher, but in high-moisture Ontario homes, porcelain wins on durability, water resistance, and resale value over a 25-30 year lifespan.
Why Wood Look Porcelain Has Taken Over Ontario Showrooms
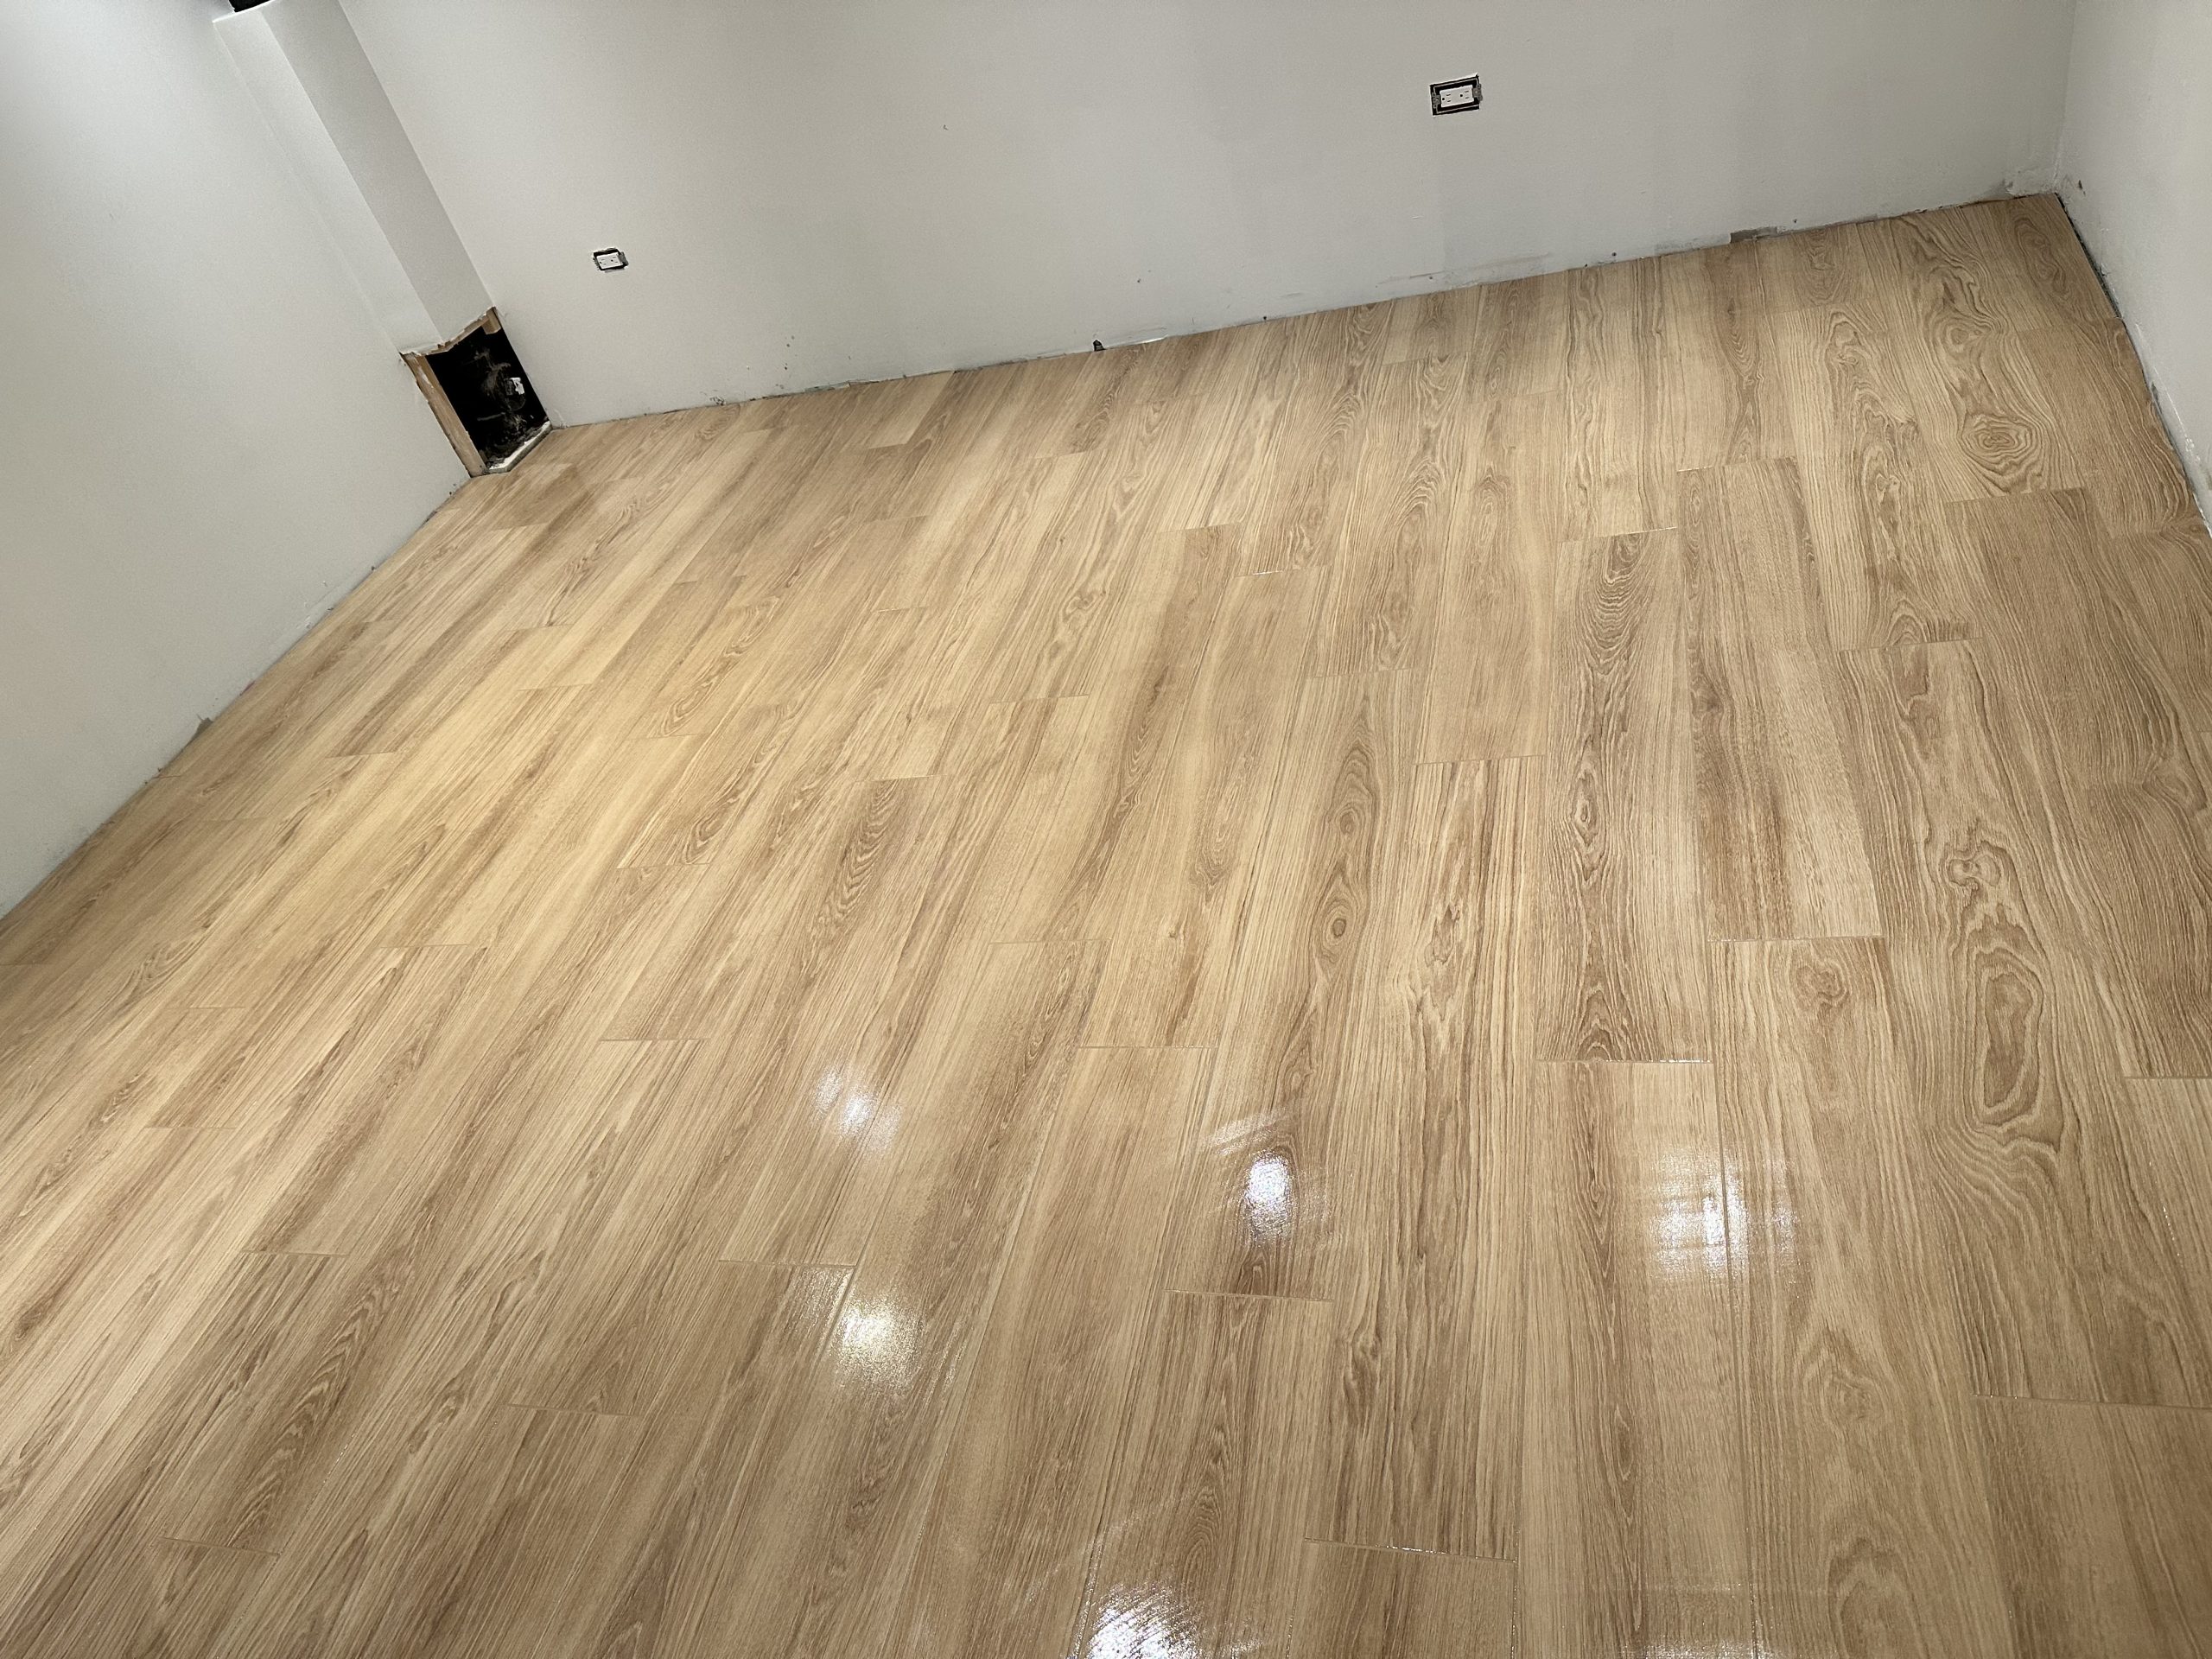
Over the past decade, wood look tile has become one of the fastest-growing flooring categories in residential renovation. The appeal is straightforward: the warmth and visual character of hardwood, combined with the durability and water resistance of porcelain. For Ontario homeowners dealing with wet winters, muddy entryways, and humid bathrooms, that combination is hard to argue with.
Modern manufacturing has made wood look porcelain genuinely difficult to distinguish from real hardwood. High-definition digital printing combined with three-dimensional surface texturing creates authentic grain patterns, knots, and color variation. Plank sizes now range from traditional 6″x24″ up to large format 12″x48″ tiles. The result looks like real wood and performs nothing like it.
But this popularity has come with a problem: a lot of homeowners are buying these tiles without fully understanding what makes them different to install, what to look for when selecting them, and what separates a good result from a failed one. This guide covers all of it.
Understanding What You’re Actually Buying
Wood look porcelain is made from refined clay fired at extremely high temperatures, between 1200 and 1400 degrees Celsius. That process creates a dense, non-porous material that ranks 7-8 on the Mohs hardness scale and absorbs less than 0.5% water. It is genuinely one of the hardest residential flooring materials available.
The important distinction is between porcelain and ceramic wood look tile. Ceramic is less dense, absorbs 3-7% water, and is more prone to chipping under heavy impact. It costs less upfront but is not appropriate for bathrooms, kitchens, or any area with consistent moisture exposure. In the GTA climate, where entryways and laundry rooms take a beating year-round, porcelain is the right call in most cases.
Porcelain wood look tile costs $3-10 per square foot for materials. Installed by a professional in Ontario in 2026, expect $9-20 per square foot all-in depending on tile size, pattern complexity, and subfloor condition.
Looking For A Quote?
Expert In Porcelain Tile Installation
We value that proper tile installation is one of the most important parts of any renovation project.
Clean, Friendly, And Professional
Feel comfortable having us in your home while we do our work.
Stress Free Experience
We’ll take the stress out of your renovation by being your guide throughout the experience.
To Get A Quote, Please Complete This Form
The Manufacturing Reality: No Tile Is Perfect
This is the part retailers rarely explain clearly. All ceramic and porcelain tiles go through a kiln firing process that creates unavoidable inconsistencies. Even with rigorous quality control processes covering thickness, color, glaze uniformity, and dimensional accuracy, imperfections happen. Understanding them before you buy is the difference between a smooth project and an expensive one.
Dimensional Inconsistencies
An 8×48 inch tile may measure exactly 8 inches on one end and 8 and 1/16 inches on the other. That small variation creates real installation challenges. Premium tiles maintain tighter tolerances, within 1/32 of an inch, making them easier to work with and allowing for tighter grout joints.
Warping and Crowning
Tiles can bow during firing, where the center sits higher than the edges. On a 48-inch plank, that gap can be 1/8 inch or more. This problem scales with tile length, which is why large format wood look planks are significantly more prone to it than smaller format tiles. An experienced installer knows how to account for this. An inexperienced one doesn’t.
Surface and Pattern Variation
Lower-end products often have only 3-5 unique face designs, meaning the repeating pattern becomes visible across the floor. Premium tiles offer 20 or more unique faces, producing a result that actually looks like random natural wood grain rather than a repeating print.
The Budget vs. Premium Spectrum
Budget tile at $2-4 per square foot tends to have higher dimensional variation, limited pattern faces, and noticeable crowning in longer planks. Mid-range at $4-7 per square foot improves consistency and pattern variation significantly. Premium at $7-15+ per square foot offers tight tolerances, extensive pattern variation, minimal warping, and rectified edges for tighter grout joints.
The right tier for your project depends on the size of your tiles and the complexity of your installation. Bigger planks require better tile.
What Makes Large Format Wood Look Tile Harder to Install
The shift to large format planks has created a category of installation challenges that standard tile work simply doesn’t involve. The most significant is lippage.
Lippage is what happens when adjacent tiles sit at different heights, creating a visible and tactile step between them. In severe cases it creates a tripping hazard. In moderate cases it just looks wrong and accelerates tile cracking at high spots.
Lippage happens for three reasons: tile crowning (the manufacturing issue described above), subfloor irregularities that standard construction tolerates but large format tile magnifies, and improper installation technique. All three are manageable with the right installer and materials.
The 50/50 Offset Prohibition
If you’re drawn to a brick-pattern layout with your wood look planks, be aware that most manufacturers prohibit a 50% offset (the standard brick pattern) for planks longer than 15 inches. The reason is geometric: the lowest point of one tile (at its end) meets the highest point of the adjacent tile (at its center), which is exactly where crowning is most pronounced. That combination creates maximum lippage potential and typically voids the manufacturer’s warranty.
The patterns that work well instead are a maximum 1/3 offset (33% stagger), a random stagger with at least 6 inches of variation between joints, or a running bond with varied offsets. These still look natural and distribute any crowning or warping far more evenly across the floor.
Subfloor Standards Are Stricter
Standard tile tolerates up to 1/4 inch of variation over 10 feet. Large format wood look tile requires 1/8 inch variation over 10 feet. That’s a meaningfully tighter standard, and most existing subfloors in Ontario homes don’t meet it without preparation work. This is not optional. Skipping it is the most common reason large format tile fails.
The Materials Your Installer Needs to Use
This is where a lot of projects go wrong. Standard thinset mortar is designed for tiles up to 15 inches. Using it on large format wood look planks is a shortcut that leads to failures.
Large Heavy Tile (LFT) Mortar
LFT mortar is the correct material for large format installations. It offers an extended open time of 30-45 minutes compared to 15-20 minutes with standard thinset, which gives the installer more time to adjust tiles into position. It can be applied up to 3/4 inch thick, providing room to correct subfloor irregularities. It has superior bond strength for heavier tiles and better workability for leveling adjustments. It costs $35-50 per 50-pound bag versus $15-25 for standard thinset. That cost difference is not a reason to skip it.
Tile Leveling Systems
Leveling systems are clips, wedges, and spacers that span adjacent tiles and hold them at a uniform height while the mortar cures. They add 15-20% to labor time and reduce lippage by 80-90%. Any installer working on large format wood look tile who tells you leveling systems aren’t necessary is telling you something important about their approach to your project.
Grout Joint Considerations
Wood look planks look best with minimal grout lines that reinforce the hardwood illusion. What’s achievable depends on your tile quality and installation precision. Rectified premium tiles with expert installation can go as tight as 1/16 inch. Most quality large format installations land at 1/8 inch. Budget tile or challenging subfloor conditions may require 3/16 to 1/4 inch to accommodate dimensional variation and prevent lippage.
Always confirm the minimum recommended grout joint with both your tile supplier and your installer before committing to a layout.
Choosing the Right Installer
The installer you hire matters more than the tile you select. That’s not an exaggeration. A skilled installer working with mid-range porcelain will outperform an inexperienced one working with premium material. The skill gap in large format wood look tile installation is wide, and the consequences of getting it wrong are expensive.
Red Flags to Watch For
An installer who dismisses leveling systems as unnecessary, insists standard thinset is fine for large format tiles, can’t provide references for similar projects completed in the past year, or is vague about their substrate preparation process is not the right installer for this job.
Questions Worth Asking
Before hiring anyone, ask: what mortar do you use for 24×48 tiles? How do you handle subfloor irregularities? What leveling systems are you familiar with? Can you walk me through your installation process from substrate prep to final cleanup? A competent installer will answer all of these directly and in detail.
What Good Looks Like
Quality installers welcome detailed questions, explain technical requirements clearly, reference manufacturer specifications, and provide itemized quotes that separate material costs from labor. If a quote lumps everything together without explanation, ask for a breakdown. If they can’t or won’t provide one, keep looking.
Wood Look Porcelain vs. Luxury Vinyl Plank: The Ontario Decision
Luxury vinyl plank has become a popular alternative to wood look porcelain because of its lower upfront cost and DIY-friendly installation. For some situations it makes sense. For most Ontario homes, wood look porcelain is the stronger long-term choice.
Durability
Porcelain ranks 7-8 on the Mohs hardness scale. It resists scratches from pet claws, furniture, and daily traffic with exceptional performance. It will not fade over time. Lifespan is 25-30+ years, often outlasting the home itself.
LVP relies on a protective wear layer, typically 12-28 mil thick, that defends against everyday scratches but can be cut, torn, or punctured by sharp objects or dragged furniture. It is more prone to fading in direct sunlight. Lifespan is 15-25 years with proper care, meaning it will likely need replacement at least once during typical homeownership.
Water Resistance
Porcelain absorbs less than 0.5% water. With proper installation and grouting, moisture never reaches the subfloor. It does not warp, buckle, or gap under humidity or water exposure. It is genuinely appropriate for bathrooms, including shower walls, kitchens, laundry rooms, and basements.
LVP’s vinyl surface is water-resistant, but its protection is only as good as the installation. If gaps form between planks, moisture seeps underneath, which can cause mold, mildew, and subfloor damage. In Ontario’s climate, that risk is real in any consistently wet environment.
Cost Over Time
For a 1,000 square foot installation:
Wood look porcelain runs $11,000-$25,000 installed upfront. Over 30 years, that’s the full cost. Annual cost per square foot works out to roughly $0.37-$0.83.
LVP runs $3,000-$7,000 installed upfront but will likely require replacement once during that same 30-year window, bringing the lifetime cost to $6,000-$14,000. Annual cost per square foot works out to roughly $0.20-$0.47.
The upfront gap is significant. The long-term gap is much smaller, and porcelain’s positive impact on resale value narrows it further. Buyers perceive tile as a premium, permanent flooring. LVP is viewed as practical but not premium.
When LVP Makes More Sense
LVP is a legitimate choice for bedrooms, home offices, or playrooms where moisture isn’t a concern and a softer, warmer feel underfoot matters. It’s also appropriate for shorter-term homeownership situations where recouping renovation costs at resale is a priority. If DIY installation is important to you, LVP is far more forgiving than wood look porcelain, which carries real risk of costly mistakes without professional expertise.
Buying Smart: What to Check Before You Commit
In-Store Evaluation
When you’re in the showroom, pull tiles from multiple boxes and measure both ends of plank tiles. A quality tile should be consistent. Place the tile on a flat surface and check for rocking or gaps, which reveals crowning. Look at the texture depth and glaze consistency, and compare the pattern variation across 8-10 tiles to see how quickly the repeat becomes obvious.
Questions for Your Retailer
Ask: what installation challenges have other contractors reported with this product? What does the manufacturer specify for mortar type? Are there offset pattern limitations? What is the recommended minimum grout joint width? A retailer who can’t answer these questions is not equipped to sell you large format wood look tile.
Order a Sample Box First
Before committing to a full order, get a sample box. Open every tile, inspect for consistency, test the layout in your actual space, and have your installer assess the product before you order the full quantity. This step costs almost nothing and can save you from a significant mistake.
Understand Product Grades
First quality (Grade 1) tile meets all manufacturer specifications, has minimal defects under 5%, and carries full warranty coverage. Second quality (Grade 2) has minor cosmetic imperfections, slight dimensional variation, and limited or no warranty. Closeout or discontinued tile may mix production runs with inconsistent color or texture. Know what grade you’re buying.
Substrate Preparation: The Step That Determines Everything
Large format wood look tile magnifies every subfloor imperfection. What a 12×12 tile tolerates, a 12×48 plank exposes. Proper substrate preparation is not optional.
Common preparation approaches include self-leveling compound (a pourable formula that creates a perfectly flat surface, typically 1/8 to 1 inch thick), a mortar bed (traditional thick-bed installation that allows significant leveling but requires a skilled craftsman), and cement backer board over plywood for wood subfloors.
Waterproofing adds $2-4 per square foot to the project cost and is essential for any bathroom, laundry room, or entryway. In Ontario homes, that covers most of the spaces where wood look porcelain gets installed.
Build the cost of substrate preparation into your budget from the start. It gets discovered during the project regardless, and being surprised by it mid-installation is worse than planning for it upfront.
Final Thoughts
Wood look porcelain tile is one of the best flooring choices available for Ontario homes. It handles the climate, the moisture, the foot traffic, and the resale expectations that come with owning property in the GTA better than most alternatives. But it is not a forgiving product. It rewards proper planning, quality materials, and skilled installation, and it punishes shortcuts.
At Canadian Tile Pro, we’ve installed wood look porcelain across Oakville, Burlington, Mississauga, and Hamilton in every format from modest bathroom floors to full open-concept living spaces. We use LFT mortar, leveling systems, and manufacturer-compliant patterns on every large format job. If you’re planning a wood look porcelain project and want to get it done right from the start, reach out for a quote and let’s talk through what your space actually needs.

Trusted Tile Installation Experts
At Canadian Tile Pro, we don’t just lay tile, we build lasting spaces. Founded by Sol, a certified tile installer and author of the popular book Tile Confidential, we bring precision, craftsmanship, and total transparency to every project in Oakville.
Expert In Porcelain Tile Installation
We value that proper tile installation is one of the most important parts of any renovation project.
Clean, Friendly, And Professional
Feel comfortable having us in your home while we do our work.
Stress Free Experience
We’ll take the stress out of your renovation by being your guide throughout the experience.
To Get A Quote, Please Complete This Form


